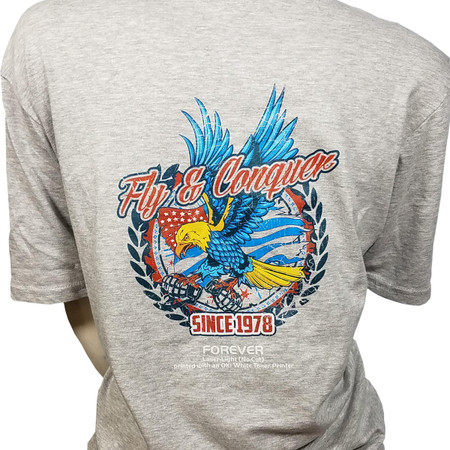
Forever Flex-Soft (No Cut) Sample Pack
- 8.5" x 11" size sheets
- Can be printed with any laser printers that use black toner.
- FOREVER Flex-Soft is a revolutionary new way of printing single-color or metallic self-weeding designs without any need for a vinyl cutter or plotter!
- This two-paper system uses a colored foil transparency-like sheet (printable) that is combined with a B-paper for adhesion, for transferring one-color designs easily and quickly.
- Self-weeding Flex Soft allows for far greater detail possibilities than is possible with cuttable heat transfer vinyl materials.
- The FOREVER Flex-Soft heat transfer paper can be pressed onto not only just t-shirts but a wide range of fabric goods made of cotton, polyester, spandex, nylon, etc.
- Can be applied to white/dark t-shirts of any color. Can be applied to cotton, polyester, nylon, and more!
- Test other fabrics before production. Can also be pressed to wood, paper, ceramic, polypropylene, and other "hard surface" items.
- Holds up to 10-40 washes
- Compatible with OKI printer models: C831TS, C711WT, and 920WT *
- Please note: The following colors are not compatible with white toner printers - Metallic Silver, Metallic Gold, Black.
- Self-weeding heat transfer paper.
- Pack comes with (20) sheets of Flex-Soft (No Cut) in a variety of colors:
Standard Colors: White, Black, Ivory, Cyan, Royal Blue, Red, Golden Yellow, White Gold, Jade Green
Metallics: Gold, Silver, Blue, Bronze, Red, Lilac, Green
Neons: Green, Orange, Pink, Yellow (20) sheets of Laser Dark (No Cut) B Paper LowTemp (1)
11x17 sheet of parchment/pressing paper (1) Pre-printed sheet of Flex-Soft (No Cut)
Printing instructions
Wash in warm or cold water (105 degree max. Hang/line dry)
Additional Instructions
- Can ONLY be used with a Laser Toner Printer
- Any Laser Printer can be used Laser CMYK Printers will also work
- Printer needs to have a polymer based material
Printing:
- This paper can be printed on either the matte side of the colored sheet (Sheet A) or the white side of the Adhesive Sheet (Sheet B) Sheet A has is the colored paper.
- It has a clear liner on one side and a coating liner on the other side (the dull side) Sheet B is the white paper with Forever written on one side and white on the other.
Printing on Sheet A:
Needs to be printed in Mirror Image
Settings on Printer:
- Needs to be set Paper Type to Transparency/Glossy setting
- Turn up the toner so you maximize the amount of toner that comes out of the printer
- Print on the matte side of the material (testing is recommended on regular paper to see how your printer prints)
- For good quality on printing always use: Photo High Resolution Mode
- Toner Density is the best and put toner at the maximum dark Pressing Part
- A&B Paper: Swing Away Heat press is the press that is recommended
- If using a Clam Shell please make sure there is as much solid pressure as possible and that the bottom platen is always hot for the product to work
Pressing when you Printed on Side A:
- Sheet A always goes down first.
- Put this product with the glossy side down & the artwork image up.
- Put the Forever Sheet B paper on top of this with the Forever written part facing up. You will realize that this paper is a little smaller than the Sheet A, which is what you want as the adhesive will smudge out a little onto Sheet A when pressed.
- Sheet B is ALWAYS on top of Sheet A
Press Settings:
- Temperature: 266-293 Degrees
- Time: 90 Seconds (A4) or 120 Seconds (A3)
- Pressure: Medium/High Pressure (you do NOT want to go max pressure or you can ruin the sheets)
- Cover the image with Parchment Paper
- Peel Hot
- LEAVE the image on the platen as you do not want it to get cold.
- Do NOT lift off the platen when peeling. Grab on to each corner & peel in a steady/firm/consistent fashion
- If the adhesive gets cold air on it, it will get hard and could ruin the image to not stick to the garment or peel correctly
- There is ALWAYS going to be glue residue around the corners. You need to trim this away because even if you don’t see it, it will appear on your garment.
Pressing when you Printed on Side B:
- Sheet A always goes down first.
- Put this product with the glossy side down & the dull side up
- Put the Forever Sheet B paper on top of this with the Image side down.
- You will realize that this paper is a little smaller than the Sheet A, which is what you want as the adhesive will smudge out a little onto Sheet A when pressed.
- Sheet B is ALWAYS on top of Sheet A
Press Settings:
- Temperature: 266-293 Degrees
- Time: 90 Seconds (A4) or 120 Seconds (A3)
- Pressure: Medium/High Pressure (you do NOT want to go max pressure or you can ruin the sheets)
- Cover the image with Parchment Paper
- Peel Hot
- LEAVE the image on the platen as you do not want it to get cold.
- Do NOT lift off the platen when peeling.
- Grab on to each corner & peel in a steady/firm/consistent fashion
- If the adhesive gets cold air on it, it will get hard and could ruin the image to not stick to the garment or peel correctly
- There is ALWAYS going to be glue residue around the corners. You need to trim this away because even if you don’t see it, it will appear on your garment.
Pressing Image onto Garment:
Place your garment on the heat press.
Place your image onto the garment with image side down
Cover your image with parchment paper
Press Settings:
Temperature & Time:
Cotton: 275 F° - 310 F° | 30 seconds | medium pressure (40-60 psi)
Polyester: 275 F° | 30 seconds | medium pressure (40 psi)
Polypropylene: 212 F° | 20 seconds | light pressure (30 psi)
Blend Fabric: 266 F° | 30 seconds | medium pressure (40-60 psi)
Paper/Carton: 212 F° | 15 seconds | light pressure (20-30 psi)
Book Covers: 230 F° | 15 seconds | light pressure (20-30 psi)
Pressure: Change the pressure to HIGH
Peel: Completely Cold Peel back the corner & remove it in a Sheer/Roll type of way.
You want to roll it away in a slow, tight role fashion way. Comes out Glossy/Shiny & you can feel the texture
IF YOU ARE PUTTING ON SUCH THINGS AS POLYPROPYLENE BAGS, BOOK COVERS, ETC YOU CAN BE DONE AS THE ITEM WILL NOT BE WASHED
IF YOU ARE PUTTING ON A GARMENT PLEASE FOLLOW THE NEXT STEPS:
- You will need to press the garment again
- Place the garment on the heat press and cover with parchment paper
- Press at the above settings for the material for another 20-30 seconds
- If you forget to trim the adhesive off of the Part A sheet before pressing to the garment, you can try to put ThemoTape on it before pressing and then after pressing peel off the ThermoTape and the adhesive should go with it!


